Sunday, May 9, 2010

Whispers On The Wind

After months of work, the new series debuted yesterday evening at the Langhenrich Gallery in the Unitarian Universalist church in Fort Wayne! The series is a tribute to my mother, who passed away May 23, 2009.

The piece above is Voices in the Forest, a digital collage on rust-dyed fabric. The backing is also rust-dyed fabric and includes the quotation: "How quiet the forest would be if only he with the best voice sang!"


These digital collages, such as Secrets of the Butterfly Fairy, above, combine vintage artwork and photographs I have taken.


There are 12 pieces in the series. They all, including Naptime Escape (above) have cold-forged copper "frames" that have been flashed with a propane torch (takes longer than it sounds) and sealed with Earth Safe Finishes Sealer to prevent color change.


You can see the stencil layer in most of the photos, including Mushroom Girl (above)

All collages were printing in black and white, even Invitation to Tea (above) and then color was added with Earth Safe Finishes watercolor recipe for fabric.

How High The Moon is a particular favorite! The delicate rusted tie-dye background enriches the moonscape with texture. The moon is highlighted with a shimmering gold metallic paint, the stars are white metallic, and the tree is heavily textured with free-motion stitching.


Guarding the Gerberas is on heavily rusted fabric. It was one of the original two compositions that led to this series. I learned a lot about printing on rust-dyed fabric!


The background fabric for Flight Lessons (above) was rusted with springs from the seat of an old chair.

Morning of the Unicorn features distressed mylar wrapping paper cut into shapes and then stitched to the background.

Monday, May 3, 2010

Studio Tour

I can't figure out how to move the photo of the cupcake tree to the proper place, but here they are. Aren't they beautiful? Arlette made scads of mini champagne cupcake with champagne icing, orange (my favorite color) sugar, and tiny edible pearls. How elegant!

It stormed in the night and I had visions of an empty studio and sad artists—but no! The rain stopped shortly before the Studio Tour opened and held off until shortly after the tour closed. What a blessing!

This display has Dixie Landis Bradley's beautiful paintings and collages. Notice the waterfall jacket on the dress form on the right. Dixie's husband Norman shaped a coat hanger into the profile of a woman. Isn't it perfect?

The waterfall jacket is an example of a finished Make-it/Take-it. Guests selected a blank silk scarf, rayon waterfall jacket, or poncho and dyed it in the back yard with Earth Safe Finishes spray dyes. The pieces were beautiful and each quite different from the other!

Rosie's gourd and glass pins were a hit. Only one was left at the end of the day.


Amy's raku (on the right) was very popular! She now has her own raku kiln and we're begging for raku classes.

The table at the end held the blank scarves and jackets.

Rust-dyed silk scarves, T-shirts and sweatshirts shared a rack with blank purses. There were requests for a class to make the painted purse—and we'll be glad to oblige. If you have a group of at least four people interested in a class, we'll schedule one at the group's convenience.

The Make-it/Take-it table was busy all day! Amy did a MITI of a pin/magnet made from two slide mounts framing a tiny photo and April jumped right in and guided guests through making a needle-felted pin.

Rust-dyed cotton fabrics were available in fat quarters, half-yard, and full-yard cuts.

Samples of upcoming class projects were displayed on this table, and Rosie kept the area humming with explanations of the classes and passing out workshop brochures.

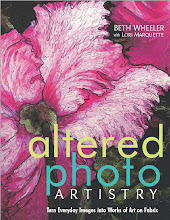
We sold the last two copies of Altered Photo Artistry from TWO printings! The book is now available as a Print-on-Demand product and will soon be offered as an e-book.

PhotoFabric really needed a demonstration going to show how it's used, but Lori had massage clients until after noon.

We've come full circle in the studio. I really wish there were photos of Arlette's refreshments. She made the most incredible champagne cupcakes and fruit slush punch!

There were five studios on the tour. If you were able to attend, you'll have to tell us how wonderful the other studios were. Thanks for stopping by my studio!

Sunday, May 2, 2010

Well, here is the finished Conversation with a Fairy from my new series about childhood fantasies. It's about 12" x 18", which is fast becoming a favorite size.

Thanks to Barbara Matthiessen, who talked me through the process of cold-forging copper tubing for an interesting hanger. I convinced the "helpful hardware man" I could punch holes in the flattened tubing, if he'd just show me which punch would go through the copper (he was doubtful!).

The embellishments are incised clay, made with rubber stamps and clay cutters. (Note to self: two holes keep the elements straight!)

The fairy has a crown of tiny gold beads, and is surrounded by a corona of gold metallic paint, made with my new recipe (using Earth Safe Finishes Colorant, Fabric Magic, and metallic powder).


I love the gold paint on top of the rust-dyed fabric! It's translucent enough that the subtleties of the rust variations show through the paint. I got carried away with the paint for her diaphanous clothing and it's a little too opaque, but that can't be helped now.

This is a close-up of the flamed copper tubing. In some places there are more green and purples, making the patina similar to raku (I LOVE raku)!

Controlling the shape of the tubing is still a challenge. Bending with pliers isn't bad, but the contours change as you forge the tubing and I haven't figured out how to compensate. It must have something to do with rolling the tubing as it's bent and then "unrolling" it as the tubing is pounded.

At any rate, the first three of 16 pieces of the new series are finished and in the copper frames. As with any art technique, it should get easier with practice.

Any tips? I'm open to suggestions!

The opening reception for the show is next Saturday at the Langhinrich Gallery in the Unitarian Universalist Church in Fort Wayne, Indiana. 6:30-8:00 pm. You're invited!


Thursday, April 29, 2010

Getting ready for the studio tour on Saturday!! Darrell, the carpet magician just left and everything looks clean and wonderful. Since this is the only time it will look this good, I took photos to prove it once looked this great.

Standing at the foot of the stairs, this is the view to the right (ish). Two desks and multiple printers are located at that end. The new (to me) 24"-wide Epson 7600 printer is standing in the little kitchen of the studio level, so you can't see it.


Still standing at the foot of the stairs, looking slightly to the left is the door out to the “three-season conference room” (patio)and the rust studio. In the distance you might be able to make out the pond.

Looking to the left of the door to the patio is the space that held the original owners’ pool table. It's perfect for shelves and work tables. The tables are outside on the patio right now.
We moved a truck load of studio stuff to the storage unit yesterday. Some will come back, but most will stay there until I can bear to give it away or sell it.

We've come full circle. The stairs are to the right, behind the bins and shelves on the right. The bathroom is on the other side of the wall with the tall shelves and three shorter bin units. The little kitchen is to the left and you can see the cabinets, refrigerator, and sink (kind of).


These wire drawers hold the quilting fabric. The quantity has dwindled some and will continue to do so as I rust all the sweet prints no longer used in my work.

Hope you've enjoyed the little tour! Saturday, the work tables will come back inside to hold product for sale, make-it/take-it equipment, and refreshments.

Pray for the storms to hold off until Sunday!!

Thursday, April 22, 2010

It's been so long since I've posted on this blog, I had to reset the password!!

The little beauty above is approximately 8 1/2" x 11" and was the door prize at the quilt guild in Lafayette, Indiana last night.

They had a cancellation in their program and invited me to share the Altered Photo Artistry trunk show with their members. What a delightful group of quilters! I'm just sorry they didn't book the workshop, too. They would have loved it!


The door prize quiltie is the first I've cut along the outline of the petal. It took a bit more time to satin-stitch the edges, but the result was well worth two trips around the periphery.

Speaking of workshop quilts, the example above (detail below) is from Pat Iannone. She started this quilt last month in a workshop and sent the photo at the beginning of April.

Hand-stitched beads in the center really add to the texture. Great job Pat!


Sylvia Polk started this beautiful piece of persimmon leaves at the California Association of Machine Embroiders in Santa Maria March 12th. In spite of her busy schedule, Sylvia finished this and e-mailed a photo to me.

Her piece really emphasizes the importance of the outlining step to control the emphasis of the image.

Thanks for sharing, ladies!

Sunday, March 21, 2010


I'm usually a woman of few words, but the California Association of Machine Embroiders seminar in Santa Maria, California has me bubbling with enthusiasm!


What an incredibly talented and prolific group of ladies! The photo above shows 10 from the Altered Photo Artistry workshop. They each sent a photo to me before the workshop. I altered the photo, enlarged it, and printed it on fabric. So, when everyone arrived in the classroom, they were ready to start stitching!


This is Barbara. She took the Altered Photo Artistry workshop on Friday and then taught a workshop on needle-felting with an embellishing machine on Saturday. Very fun!


Betty (immediate past president of CAME) is working on a photo of the famous California poppy. The weather was just warming up during the seminar and the poppies were, well, "popping" out everywhere.


The back of Carol’s piece really shows the outlining she's completed on the blossom and stem …


and it's even more striking from the front!


Diane (president elect) was co-chair of the 2010 seminar, but took the time out of the hectic schedule to take the Altered Photo Artistry workshop!

Isabel is working on a Gerbera daisy. BTW: CAME has a tradition of making and giving favors at lunch each day. Isabel and Judy made adorable pincushions in the shape of cupcakes for everyone!


Here's Judy working on an altered daffodil. She later invited me to her beautiful home, where I got to see some of her award-winning art quilts!


Rhoda is wearing a kimono from the surface design workshop "Tattoo Your Style," but she participated in the Altered Photo Artistry workshop also. Rhoda is the one responsible for making it possible for me to attend the CAME seminar—and I hope it isn't the last!


Isn't Ruth's calla lily awesome? We altered the lily's color a bit, but the striking feature is the water droplets! The way she outlined them really made them stand out. Can't wait to see it mounted and framed!


Sharon is the other seminar co-chair. Her energy and stamina was amazing. What a shining example of grace and love. She is working on a kaleidoscope, which we discovered is probably not a good subject for a first-time project. All the CAME members are accomplished in free-motion work, but the Altered Photo Artistry technique is best experienced the first time on a single blossom. Now we know!


You've probably seen Sylvia's work in various quilt magazines and on the runway of the prestigious Fairfield (or is it Bernina) Fashion Show. Here she has outlined leaves on a branch to emphasize the depth and dimension of the branch.


Zerita's hollyhock pops out of the background because of the way she has outlined the flower. Next, she'll begin to fill with color to accent highlights, deepen shadows, and saturate midtones.

This row of cypress trees was photographed in a cute little town, not far from Santa Maria. They indicate the visit is over—for this time. I hope to return to the California Association of Machine Embroiders (CAME) seminar next year. What a delightful group of ladies. They sure know how to have a good time!

Sunday, March 7, 2010

I'm so excite to announce, I am a faculty member of CraftEdu.com! Beginning in April, several of my Photoshop Elements, Altered Photo Artistry, rust-dyeing, and needle-felting classes will be available. Here's a link to my faculty gallery. Let me know what you think! http://craftedu.faculte.com/bp/MzA0ODMyOTQ5NA

“CraftEdu is a creative powerhouse of talent covering many art and craft media. Faculty members have been selected based on their expertise and ability to instruct and inspire students. Together, they are a team of the best and the brightest the art and craft world have to offer.

On its state-of-the-art platform, CraftEdu brings this considerable talent and their expertise into the homes of students worldwide. Created and designed by Faculte, this powerful, browser based platform provides a unique alternative to conventional pdf-based class presentations and creates a near in-person teaching environment.

CraftEdu will launch in beta in March 2010 and anticipates an official launch in April 2010.”

CraftEdu is the brainchild of polymer clay artist Donna Kato, her husband Vernon, and a creative team. This creative powerhouse has worked tirelessly for more than two years. to put the platform and software together. It is like no other online education experience!

BTW: I’ll be at the California Association of Machine Embroiders in Santa Maria next week. So, watch for new photos of workshops in Altered Photo Artistry, Rust-Dyeing, and a Surface Design technique known as graffiti or tattooing!