Showing posts with label Earth Safe Finishes. Show all posts

Wednesday, May 30, 2012

JOY Jam Hearts Tutorial

JOY Jam Hearts Tutorial


Easy peasy! The hardest part is choosing fabric, thread, and encouraging words. These two hearts, including taking the photos, took less than 45 minutes. 


1. Fuse fleece on the back of the fabric for the front. I really love rust-dyed fabric and save all the scraps, as well as scraps of fusible fleece. So far, all supplies for the two dozen hearts completed for Joy Jam have come from the scrap bin. LOVE that!


1. Apply my favorite metallic fabric paint (Earth Safe Finished opaque Shimmers) through a gorgeous stencil. This 6"-square stencil is from The Crafters Workshop.


3. While the paint is still wet, brush two colors of mica powders onto the open stencil areas and brush lightly to blend.


4. While the paint is drying, cut heart templates from cardstock. 


5. The paint dries in just a few minutes. It’s easy to move the template around on the fabric to preview the look of the finished heart.


6. I've adjusted the contrast so you can see the pencil outline of the two hearts on the stenciled fabric. It would not have been possible to get a third heart out of this, because the seam allowances need to be added to the outline. 


7. Position the printed twill tape (tutorial posted yesterday) on each of the hearts and stitch in place through all layers with a straight stitch.


The backing is also rusted fabric (yes, I rust printed fabric as well as solids) with fusible fleece bonded to the wrong side.


8. Front and back are placed together with fleece sides together. I really have to concentrate to make wonky stitching along the pencil marks, but several trips around the hearts with variegated thread provide a nice texture and color.


9. When the stitching is complete, cut around the stitching adding a small “seam allowance.” No, I don't measure.


Front and back. I love the serendipitous nature of rust-dyeing print fabrics! It has inspired me to look at the fabric bins in a whole new way.


Here are the two Joy Jam hearts ready for final embellishment (or not). Some of the recipients of my 100 hearts will be testosterone units (men) and will appreciate hearts free of lace, beads, buttons, and charms.

I hope you choose to join me in Joy Jam. Whether you make three hearts or three hundred, passing them to friends, associates, colleagues, or strangers on the street is a fun way to share JOY with someone and it will make you smile inside and out!!

Sunday, July 4, 2010

Art Blast in Syracuse, Indiana yesterday was, well, a blast! There were about 20 vendors located in and around The Creative Fish Gallery. There was a steady stream of friendly folks visiting and shopping all day!

Can you believe all this (except the refrigerator box) fit in my little Vibe? LOVE the Vibe! It doesn't look big, but with the seats folded down, there is continuous cargo space from dashboard to hatch AND it gets 30 mpg hauling all that stuff. Amazing!


Teacup "Candle-ier" was once again the subject of much discussion.


Two Sipsters Studio jewelry drew a lot of attention.


As did the Re-Chic Boutique items. (Yes the baker's rack folds flat and fit into the Vibe!)


A set of three serving pieces in graduated sizes. The delicate roses on the Noritake N78 (or was it N73) are really an eye-catcher.


This set of four ivy servers in graduated heights is beautiful on a table for any special occasion.


Kids and adults alike were drawn to the "spray-dye it yourself" booth. Select a blank, such as a cotton T-shirt, silk scarf, or rayon waterfall jacket and apply spray dyes in our special booth (formerly known as the refrigerator box).


This is a cotton top I made for Lori in our favorite colors, purple (her favorite) and orange (my favorite).

There were children as young as 7 having a great time spraying the colors onto the shirts. The sun dried the blanks quickly and they went home for heat-setting the next day.


All the color was from Earth Safe Finishes, of course! Safe for the environment; safe for the artist. It took only two droppers full of Colorant + 1 dropper full of Fabric Magic in about 16 ounces of water. Gotta love it!! http://www.earthsafefinishes.com

We'll be back for Art Fest in Syracuse at the end of the month—or our work is in The Creative Fish in Syracuse. Drop by on your way to or from Lake Wawasee!!

Sunday, May 9, 2010

Whispers On The Wind

After months of work, the new series debuted yesterday evening at the Langhenrich Gallery in the Unitarian Universalist church in Fort Wayne! The series is a tribute to my mother, who passed away May 23, 2009.

The piece above is Voices in the Forest, a digital collage on rust-dyed fabric. The backing is also rust-dyed fabric and includes the quotation: "How quiet the forest would be if only he with the best voice sang!"


These digital collages, such as Secrets of the Butterfly Fairy, above, combine vintage artwork and photographs I have taken.


There are 12 pieces in the series. They all, including Naptime Escape (above) have cold-forged copper "frames" that have been flashed with a propane torch (takes longer than it sounds) and sealed with Earth Safe Finishes Sealer to prevent color change.


You can see the stencil layer in most of the photos, including Mushroom Girl (above)

All collages were printing in black and white, even Invitation to Tea (above) and then color was added with Earth Safe Finishes watercolor recipe for fabric.

How High The Moon is a particular favorite! The delicate rusted tie-dye background enriches the moonscape with texture. The moon is highlighted with a shimmering gold metallic paint, the stars are white metallic, and the tree is heavily textured with free-motion stitching.


Guarding the Gerberas is on heavily rusted fabric. It was one of the original two compositions that led to this series. I learned a lot about printing on rust-dyed fabric!


The background fabric for Flight Lessons (above) was rusted with springs from the seat of an old chair.

Morning of the Unicorn features distressed mylar wrapping paper cut into shapes and then stitched to the background.

Monday, May 3, 2010

Studio Tour

I can't figure out how to move the photo of the cupcake tree to the proper place, but here they are. Aren't they beautiful? Arlette made scads of mini champagne cupcake with champagne icing, orange (my favorite color) sugar, and tiny edible pearls. How elegant!

It stormed in the night and I had visions of an empty studio and sad artists—but no! The rain stopped shortly before the Studio Tour opened and held off until shortly after the tour closed. What a blessing!

This display has Dixie Landis Bradley's beautiful paintings and collages. Notice the waterfall jacket on the dress form on the right. Dixie's husband Norman shaped a coat hanger into the profile of a woman. Isn't it perfect?

The waterfall jacket is an example of a finished Make-it/Take-it. Guests selected a blank silk scarf, rayon waterfall jacket, or poncho and dyed it in the back yard with Earth Safe Finishes spray dyes. The pieces were beautiful and each quite different from the other!

Rosie's gourd and glass pins were a hit. Only one was left at the end of the day.


Amy's raku (on the right) was very popular! She now has her own raku kiln and we're begging for raku classes.

The table at the end held the blank scarves and jackets.

Rust-dyed silk scarves, T-shirts and sweatshirts shared a rack with blank purses. There were requests for a class to make the painted purse—and we'll be glad to oblige. If you have a group of at least four people interested in a class, we'll schedule one at the group's convenience.

The Make-it/Take-it table was busy all day! Amy did a MITI of a pin/magnet made from two slide mounts framing a tiny photo and April jumped right in and guided guests through making a needle-felted pin.

Rust-dyed cotton fabrics were available in fat quarters, half-yard, and full-yard cuts.

Samples of upcoming class projects were displayed on this table, and Rosie kept the area humming with explanations of the classes and passing out workshop brochures.

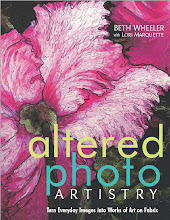
We sold the last two copies of Altered Photo Artistry from TWO printings! The book is now available as a Print-on-Demand product and will soon be offered as an e-book.

PhotoFabric really needed a demonstration going to show how it's used, but Lori had massage clients until after noon.

We've come full circle in the studio. I really wish there were photos of Arlette's refreshments. She made the most incredible champagne cupcakes and fruit slush punch!

There were five studios on the tour. If you were able to attend, you'll have to tell us how wonderful the other studios were. Thanks for stopping by my studio!

Sunday, May 2, 2010

Well, here is the finished Conversation with a Fairy from my new series about childhood fantasies. It's about 12" x 18", which is fast becoming a favorite size.

Thanks to Barbara Matthiessen, who talked me through the process of cold-forging copper tubing for an interesting hanger. I convinced the "helpful hardware man" I could punch holes in the flattened tubing, if he'd just show me which punch would go through the copper (he was doubtful!).

The embellishments are incised clay, made with rubber stamps and clay cutters. (Note to self: two holes keep the elements straight!)

The fairy has a crown of tiny gold beads, and is surrounded by a corona of gold metallic paint, made with my new recipe (using Earth Safe Finishes Colorant, Fabric Magic, and metallic powder).


I love the gold paint on top of the rust-dyed fabric! It's translucent enough that the subtleties of the rust variations show through the paint. I got carried away with the paint for her diaphanous clothing and it's a little too opaque, but that can't be helped now.

This is a close-up of the flamed copper tubing. In some places there are more green and purples, making the patina similar to raku (I LOVE raku)!

Controlling the shape of the tubing is still a challenge. Bending with pliers isn't bad, but the contours change as you forge the tubing and I haven't figured out how to compensate. It must have something to do with rolling the tubing as it's bent and then "unrolling" it as the tubing is pounded.

At any rate, the first three of 16 pieces of the new series are finished and in the copper frames. As with any art technique, it should get easier with practice.

Any tips? I'm open to suggestions!

The opening reception for the show is next Saturday at the Langhinrich Gallery in the Unitarian Universalist Church in Fort Wayne, Indiana. 6:30-8:00 pm. You're invited!


Sunday, January 17, 2010


The 12" x 12" square art quilt Whispers on the Wind (above) was made for Rust Tex's exhibition. If juried into the show, it will travel to England for their quilt festival. (Not that I'm hinting, Lois!)

The background began as a digital collage of photographs and vintage artwork printed on rust-dyed fabric. I added a wash of green for the forest floor, white for a shaft of light, and blue for the sky using Earth Safe Finishes Colorant + Fabric Magic + lots of water.


Free-motion stitching in a variegated black/brown thread was worked on the main tree, while monofilament was stitched free-form to represent sunlight through the forest canopy and wind through the tree branches.


Glass and stone beads were stitched on the surface by hand and the edges were finished with satin stitches.

The composition recalls a trip to the woods in early spring with my mother and grandmother to see the wild flowers. I was disappointed when my grandmother gently informed me the flowers had to stay in the forest; they would be unhappy in the garden at home. To entertain myself, I pretended the wind through the tree branches was the voice of many fairies whispering to me.

It's remarkable to me that this image, the colors, sounds, smells, and emotions are so vivid to me after 50 years or so—and a pleasant way to remember a day with two women so influential in my life!